

How To Change Periods To Size 14
Punctuation marks tend to be small-scale so it is piece of cake to error them. For example, information technology is easy to mistake a comma for a period and vice versa. For this reason, it is useful to increase the font size of the punctuation marks in your certificate to make them clear.
The flow, too known equally the full stop, is the well-nigh ordinarily used punctuation marker. There are different ways in which the menses can be used. Firstly, information technology is used at the terminate of sentences to indicate that the judgement has ended. It is also used later abbreviations, such as Mr. and Ms. Lastly, information technology is used at the finish of initials (for case, Anita Thousand.). Note that this convention is simply used in some countries.
Withal, if the size of the periods in your document is too small, they are not noticeable. The default size of the periods is the same as the font size of your document. Google Docs allows you to change the size of the periods in your document.
three methods for changing the size of the periods in your document.
- Irresolute the default font size of your document
- Using notice and replace
- Using the 'Avant-garde Find and Supercede' add-on
Method 1: Changing the default font size of your document
The kickoff method of increasing the size of periods is by irresolute the default font size of the entire document.
The downside of this method is that it doesn't let you lot to but alter the size of the periods in your document. You would also take to increment the size of the remaining text. If you want to increase the size of the periods without increasing the size of the other text, check out the tertiary method.
Pace one: Open your Google Docs certificate.
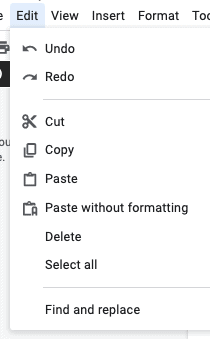
Footstep 2: Press Control (or Command) + A or click on 'Select all' from the Edit menu.
The adjacent footstep is to select your entire document. An easy mode to practice this is by pressing the Control (or Command, if you are using a Macbook keyboard) and A keys on your keyboard. All the text in your certificate should be highlighted in blueish.
Another way of selecting your entire document is by going to the Edit menu. Click on the Edit tab at the elevation left corner of your screen to open the card. So, click on the 'Select all' pick in the menu.
Stride iii: Increase the font size from your toolbar or by going to the Format carte du jour.
Adjacent, increase the font size of your document. An easy mode to do this is by using the toolbar. At the acme of the screen, yous should see the Google Docs toolbar. On the left side, you should see the font size icon. Next to the font size, in that location is a plus sign. Click on this sign to increase the font size.

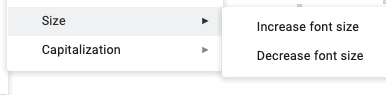
Another way of doing this is by going to the Format menu. Click on the Format tab at the top left corner of the screen to open the Format menu. Click on or hover over the 'Text' selection (which is the beginning pick) in the Format carte.
This volition open another small-scale driblet downwardly menu. Towards the bottom, you should find the 'Size' choice. Click on or hover over it to open up another menu. The first option is 'Increase font size.' Click on it repeatedly to keep increasing your font size.
(Optional) Step 4: Gear up the new font size as the default size.
This footstep is optional. If you lot desire to increase the font size only for this document, you tin skip this stride.
However, if y'all desire to ready the new font size as the default (so any new Google Medico documents y'all create will have this font size), follow this step.
An easy way to exercise this is by using the toolbar. First, select a piece of main text in your document (text that is not heading). In the Google Docs toolbar, y'all should encounter 'Normal text.' Click on this to open the paragraph styles bill of fare. The start choice is 'Normal text.' Click on this to open up another smaller card. The second (and last) selection in this menu is 'Update 'Normal text' to friction match.' Click on this option to change the default font size of your document.

Another way of doing this is past going to the Format menu. Click on the Format tab at the top left corner of the screen. Then, click on or hover over the 'Paragraph styles' choice to open some other driblet down card. From the new menu, click on or hover over the 'Normal text' pick to open up a smaller menu. Click on the second (and final) option, 'Update 'Normal text' to match,' in the carte to change the default font size of your document.

Method 2: Using discover and supervene upon
The 2d method of increasing the size of the periods in your document is past using find and supersede. The benefit of this method is that it allows you to alter the size of periods without irresolute the size of the rest of the text.
The downside of this method is that it takes a lot of time and effort as you have to manually change the font size of the periods in your document. This is why nosotros recommend using this method only if your document is not very long (e.g. less than 2 pages).
Step 1: Press Control (or Command) + F to open the Find dialog box.
The start step is to open the Find dialog box. An like shooting fish in a barrel manner to practice this is by using the keyboard shortcut. Printing Control (or Command, if you are using a Macbook keyboard) and F keys on your keyboard. This volition open the Find dialog box in the top right corner of the screen.
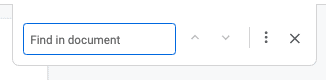
Stride two: In the Observe dialog box, type a period (.).
Adjacent, type a period in the find dialog box so that all the periods in your document are highlighted.
Step 3: Change the font size of each period in your document.
The terminal stride is to manually change the size of each catamenia in your certificate.
1 way to alter the font size is by going to the toolbar. Click on the plus sign next to the font size to increase the size.

Another way to do this is past going to the format carte. Click on Format → Text → Size → 'Increase font size.'

Apply the tiptop and bottom arrows in the Find dialog box to go through each period in your document.
In one case yous are done changing the font size of all the periods in your certificate, press Escape to close the Notice dialog box.
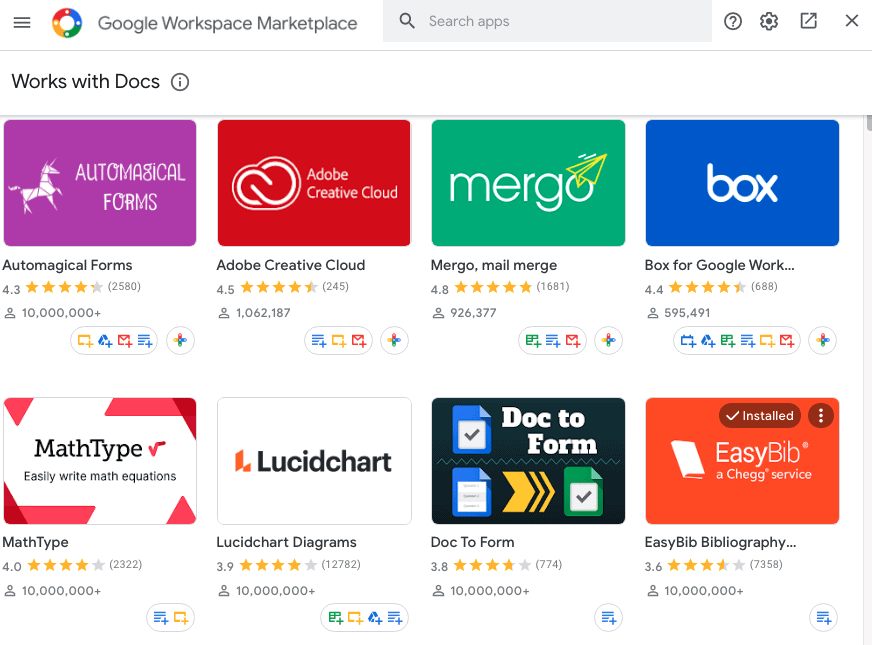
Method 3: Using the 'Avant-garde Discover and Replace' add-on
The final method involves using the Advanced Find and Replace improver. An improver is a piece of software you can install in Google Docs to go more features. For example, at that place are add together-ons for generating citations for your document.
This method is the most convenient method of all the other methods. This is considering you tin increase the font size of all the periods in your document in one get. Hence, you don't take to do it manually. This method besides allows you to increase the size of the periods without increasing the size of the remaining text in your certificate. Therefore, it saves you a lot of fourth dimension and effort.
Withal, i downside of this method is that you would accept to install an improver. One problem with installing add-ons is that they tin make your website slower. Hence, if you already have a lot of add-ons in your Google Docs, installing another i can wearisome information technology downwards.
Step 1: Click on the 'Add-ons' tab at the tiptop left corner of the screen.
The 'Add together-ons' tab is located at the top left corner of the screen. Click on information technology to open up the 'Add together-ons' carte du jour.

Pace 2: Click on 'Become add-ons' from the menu.
At the bottom of the Add-ons menu, you should see the 'Become add-ons' option. Click on information technology to open up the Add together-ons window.
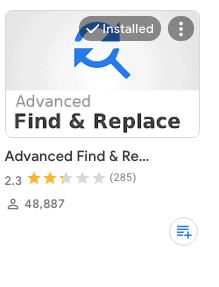
Step 3: In the search bar, blazon 'Advanced Find and Replace.'
At the summit of the Add-ons window, you should meet the search bar. In the search bar, type 'Advanced Find and Supervene upon.' Then, click on the option from the menu that appears below the search bar.

This should accept you lot to a new page which shows the icon of the improver.
Footstep iv: Click on the icon of the Advanced Discover and Replace add-on.
Next, click on the icon of the add together-on. This volition take you to a page with all the data about the Advanced Discover and Supplant add-on. You can see images of the add-on, reviews that previous users take left and other details.
Step five: Click on the blue 'Install' push.
At the pinnacle of the window, you lot should detect a bluish button named 'Install.' Click on this button to begin the process of installing the addition.
When you click on this button, you will be asked to confirm your installation. Click on 'Continue.' Then, Google Docs will enquire you to sign in to your Google account. Click on the account that you would similar to sign in to.
Once the installation is consummate, go back to the add together-ons window. Click on the x at the top right corner of the screen to close the window.
Step 6: Click on the Add-ons tab once more.
Once once again, click on the Add-ons tab at the top left corner of the screen. This volition open the Add-ons menu.
Step 7: Click on Advanced Find and Supervene upon from the Add-ons menu.
If you lot take correctly installed the Avant-garde Find and Replace add-on, yous should see it every bit an pick in the Add-ons menu. Click on it to open a smaller drib downwards menu.
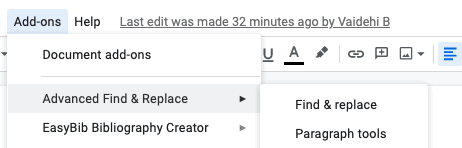
Step 8: Click on 'Discover & supplant.'
From the smaller drop down menu, click on 'Detect & replace' (which is the first pick in the bill of fare). This may open a dialog box alert you about your limit (if you want to employ the app more, you take to upgrade).
Close the warning to open up a panel on the right.
Step 9: In the 'Find' box, enter the period.
Blazon the flow (the punctuation mark) in the 'Notice' box at the top of the console.
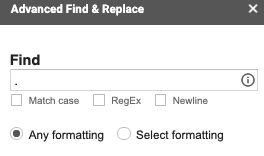
Footstep x: In the 'Replace' box, enter the period. Change the font size in the panel.
In the 'Supersede' box, one time once again enter the period punctuation. Then, increase the font size using the selection in the console.

Step 11: Click on 'Replace Selected / All.'
To increment the font size of all the periods in your document, click on the 'Supplant Selected / All' selection at the bottom of the panel.

At present, the font size of all the periods in your document should exist college.
Once y'all are done, close the panel past clicking on the x at the top correct corner.
Determination
That brings us to the stop of the article!
Thank you lot for reading!

Source: https://officebeginner.com/gdocs/how-to-make-periods-bigger-in-google-docs/
Posted by: russelldaming.blogspot.com
0 Response to "How To Change Periods To Size 14"
Post a Comment